
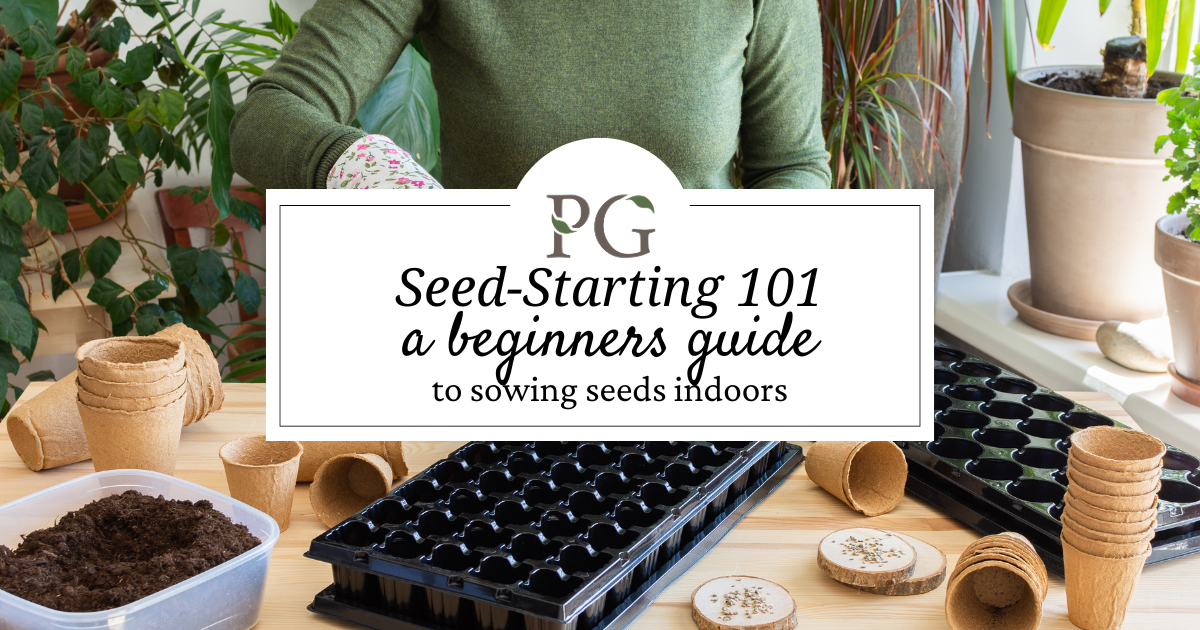
Seed Starting 101
A Beginner’s Guide to Growing Your Own Plants
Have you ever dreamed of starting your own garden from scratch?
Seed starting is a fun and rewarding way to grow your favorite plants, whether they’re flowers, vegetables, or herbs. Plus, it’s a great way to save money compared to buying fully-grown plants.
If you’re new to seed starting, this guide will walk you through the basics and set you up for success.
Why Start Seeds Indoors?
Starting seeds indoors allows you to get a jump on the growing season.
It’s especially beneficial in regions with shorter growing seasons, where you might not have enough time for certain plants to mature if you plant them directly in the garden.
Starting seeds indoors also gives you greater control over the growing environment, from temperature and light to moisture levels.
When to Start Sowing Seeds Indoors
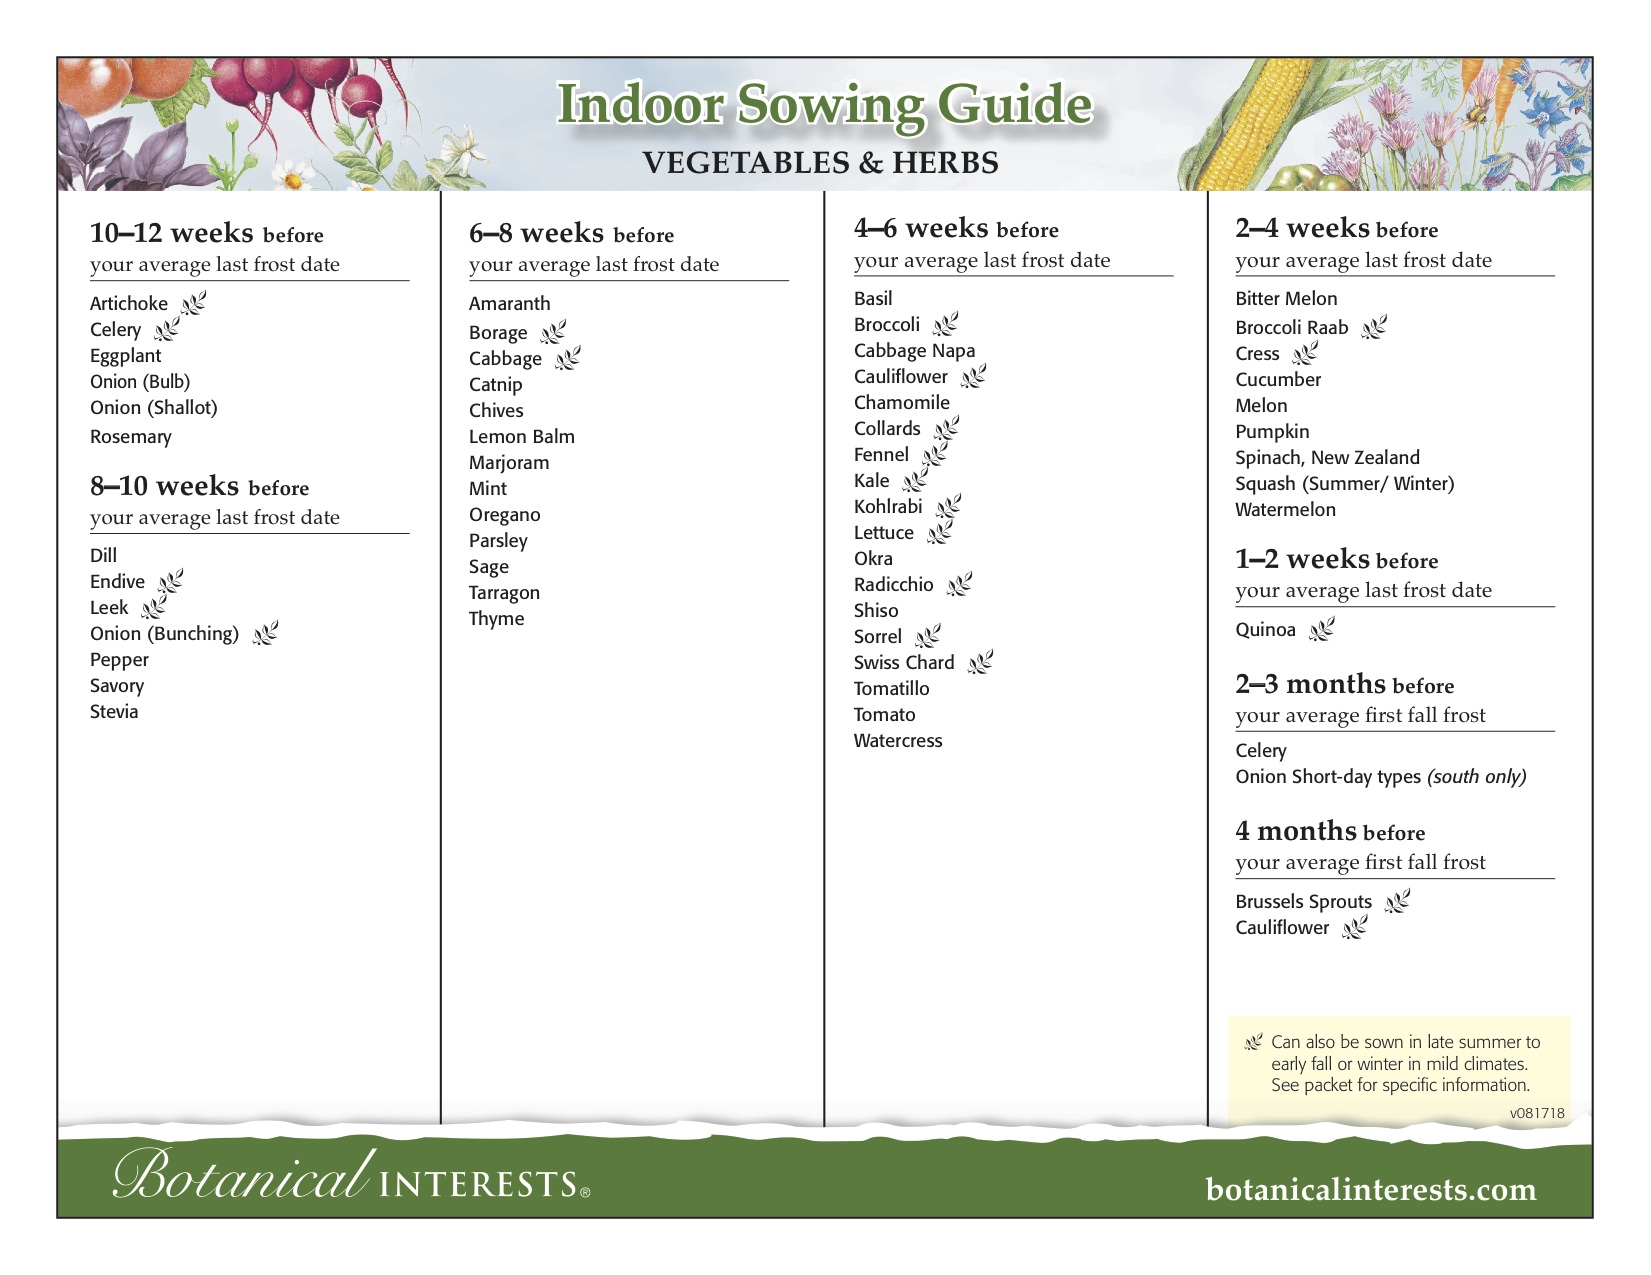
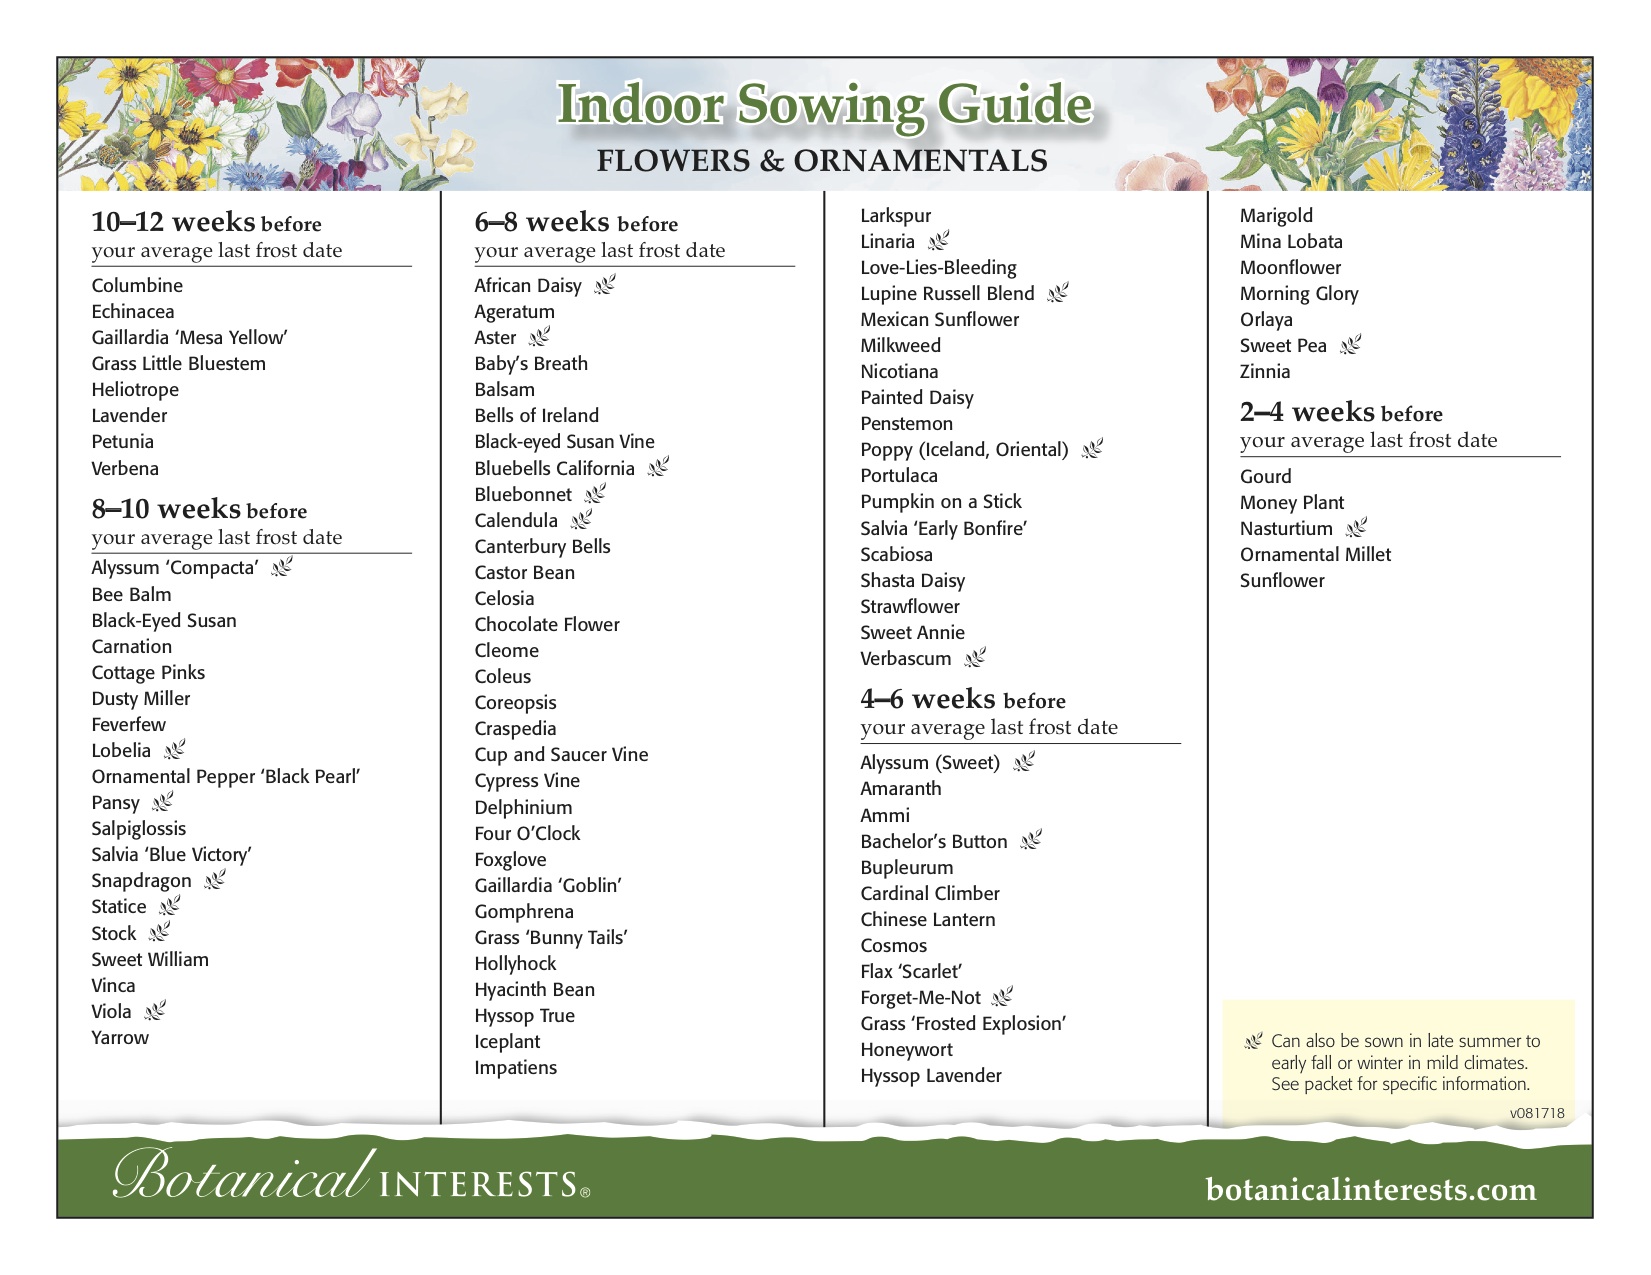
Timing is crucial when it comes to seed starting. The ideal time to start seeds indoors depends on the type of plant and your local growing season.
The best way to determine when to start your seeds indoors is to check the back of the seed packet for specific recommendations. Most packets will provide clear instructions, including how many weeks before your area’s average last frost date you should sow the seeds indoors. If you’re unsure about your average last frost date, you can easily find it by visiting The Old Farmer’s Almanac Frost Dates Calculator and entering your zip code.
For example, tomatoes typically need to be sown indoors 4-6 weeks before the last spring frost date. If your frost-free date is April 21st, you should plant your tomato seeds around March 10th to March 24th. Following these guidelines ensures your plants will be ready to transplant outdoors at the optimal time for healthy growth.
What You’ll Need to Get Started
Before you dive in, gather these essential supplies:
Seeds: Choose high-quality seeds for the plants you want to grow. Look for varieties suited to your climate and preferences.
Seed Starting Mix: Use a lightweight, well-draining mix designed specifically for seed starting.
Containers: You can use seed trays, recycled containers, or even eggshells—just make sure they have drainage holes.
Watering Can or Spray Bottle: Keep your soil evenly moist without overwatering.
Light Source: If you don’t have a sunny windowsill, invest in grow lights to provide adequate light.
Labels and Markers: Keep track of what you’re growing to avoid confusion later on.

Step-by-Step Guide to Starting Seeds
Fill Your Containers with Seed Starting Mix Lightly moisten the seed starting mix and fill your containers, leaving about half an inch of space at the top.
Plant the Seeds Follow the instructions on your seed packet for planting depth. Generally, seeds should be planted about twice as deep as their size.
Water Gently Use a spray bottle or watering can to moisten the soil without washing away the seeds.
Provide Light and Warmth Place your containers in a warm location, ideally between 65-75°F. Once the seeds sprout, move them under a grow light or to a sunny windowsill.
Keep the Soil Moist Check your soil daily and water as needed to keep it consistently moist, but not soggy.
Thin Your Seedlings Once your seedlings develop their first true leaves, thin them out by snipping the weaker ones at soil level to give the stronger ones room to grow.
Transplant to Larger Pots (if needed) When seedlings outgrow their containers, transplant them to larger pots before moving them to your garden.
Common Challenges and Tips for Success
Damping Off: This fungal disease can cause seedlings to collapse. To prevent it, use sterile containers and avoid overwatering.
Leggy Seedlings: Insufficient light can lead to weak, spindly seedlings. Ensure they’re getting 12-16 hours of light daily.
Hardening Off: Before transplanting seedlings outdoors, gradually expose them to outdoor conditions over 7-10 days to prevent transplant shock.
Let’s get Sowing!
Starting seeds is a fantastic way to cultivate a thriving garden and connect with nature. With a little patience and care, you’ll soon have healthy plants ready to thrive in your garden.
For the best selection of seed starting supplies, visit Prairie Gardens in Champaign, IL. From seed trays to grow lights, they have everything you need to kickstart your gardening journey!